Raspberry Pi image guide
Installing the new image for Raspberry pi 4 is pretty straightforward, this version should also be compatible with older versions of Raspberry pi’s, such as 2B+, 3 and 3B+ models.
To successfully use the new image follow the instructions below:
- Flash the new image in a SDcard.
- Insert the SDCard into the raspberry pi.
- Connect all the needed cables, such as printer, LCD and ethernet. Lastly connect the power supply cable.
tip
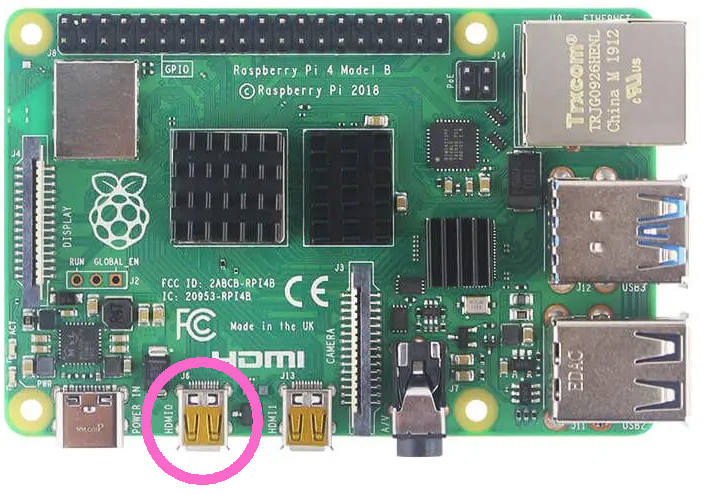
Please make sure the micro-HDMI is connected to the first of the two ports as seen below.
- Let the raspberry pi start and after a successful boot press the hotkey
Ctrl + Alt + F3 - The login menu should appear, insert the credentials Ask Q-Better team
- Find the IP address with the command:
ifconfig
- In a computer within the same subnet navigate to the IP given above.
- Press the Network Configuration button and fill the asked fields.
Attention
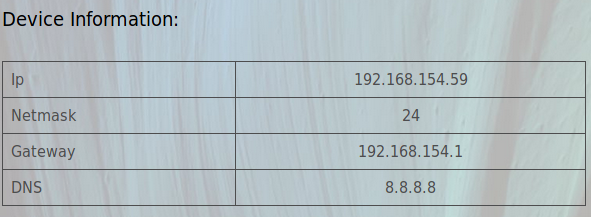
The subnet mask should be represented in bits, which means that:
- 255.0.0.0 must be 8
- 255.255.0.0 must be 16
- 255.255.255.0 must be 24
- 255.255.255.255 must be 32
Just like the image below, that represents a subnet mask ip 255.255.255.0:
- After these changes Raspberry will reboot and should have the new network configuration. It is time now to Register the Device.
- Fill the asked fields in the Register Device area and press Register.
✅ The dispenser should be connected to the bloom enterprise and working fine.