Player installation guide
Introduction
Bloom is an advanced service flow management system that provides the tools to design, manage and improve the service experience. With outstanding design and effortless usability, its modules allow full customization: from a single line to a complex service network. Bloom organizes thousands of services across industries, improving visitors, staff and managers experiences on a daily basis.
In this guide, you can find the instructions to install Bloom Enterprise players.
By connecting a Bloom player to a display, it is possible to broadcast multimedia contents promoting products or services, while keeping visitors informed about the queueing status.
Models
- Q-BEPL: BE Intel NUC Player;
Package content
Contents supplied
Q-BEPL | BE Intel NUC Player
Q-BEPL is a plug and play device composed by hardware and software.
- Player: Mini PC: Intel NUC
- Software: Bloom Enterprise player software
- HDMI cable: To connect the player to a display
- Power adapter and AC power cable: To power on the player
- VESA: VESA mount bracket, with screws
Screen or any kind of display.
Installation
To install a Bloom Enterprise player you must have:
- Connection to the Bloom Enterprise server;
- An Ethernet cable;
- A keyboard and a mouse – for the first setup;
- A display – for the first setup, and to display contents afterwards;
- A device to access the Bloom Enterprise’s backoffice.
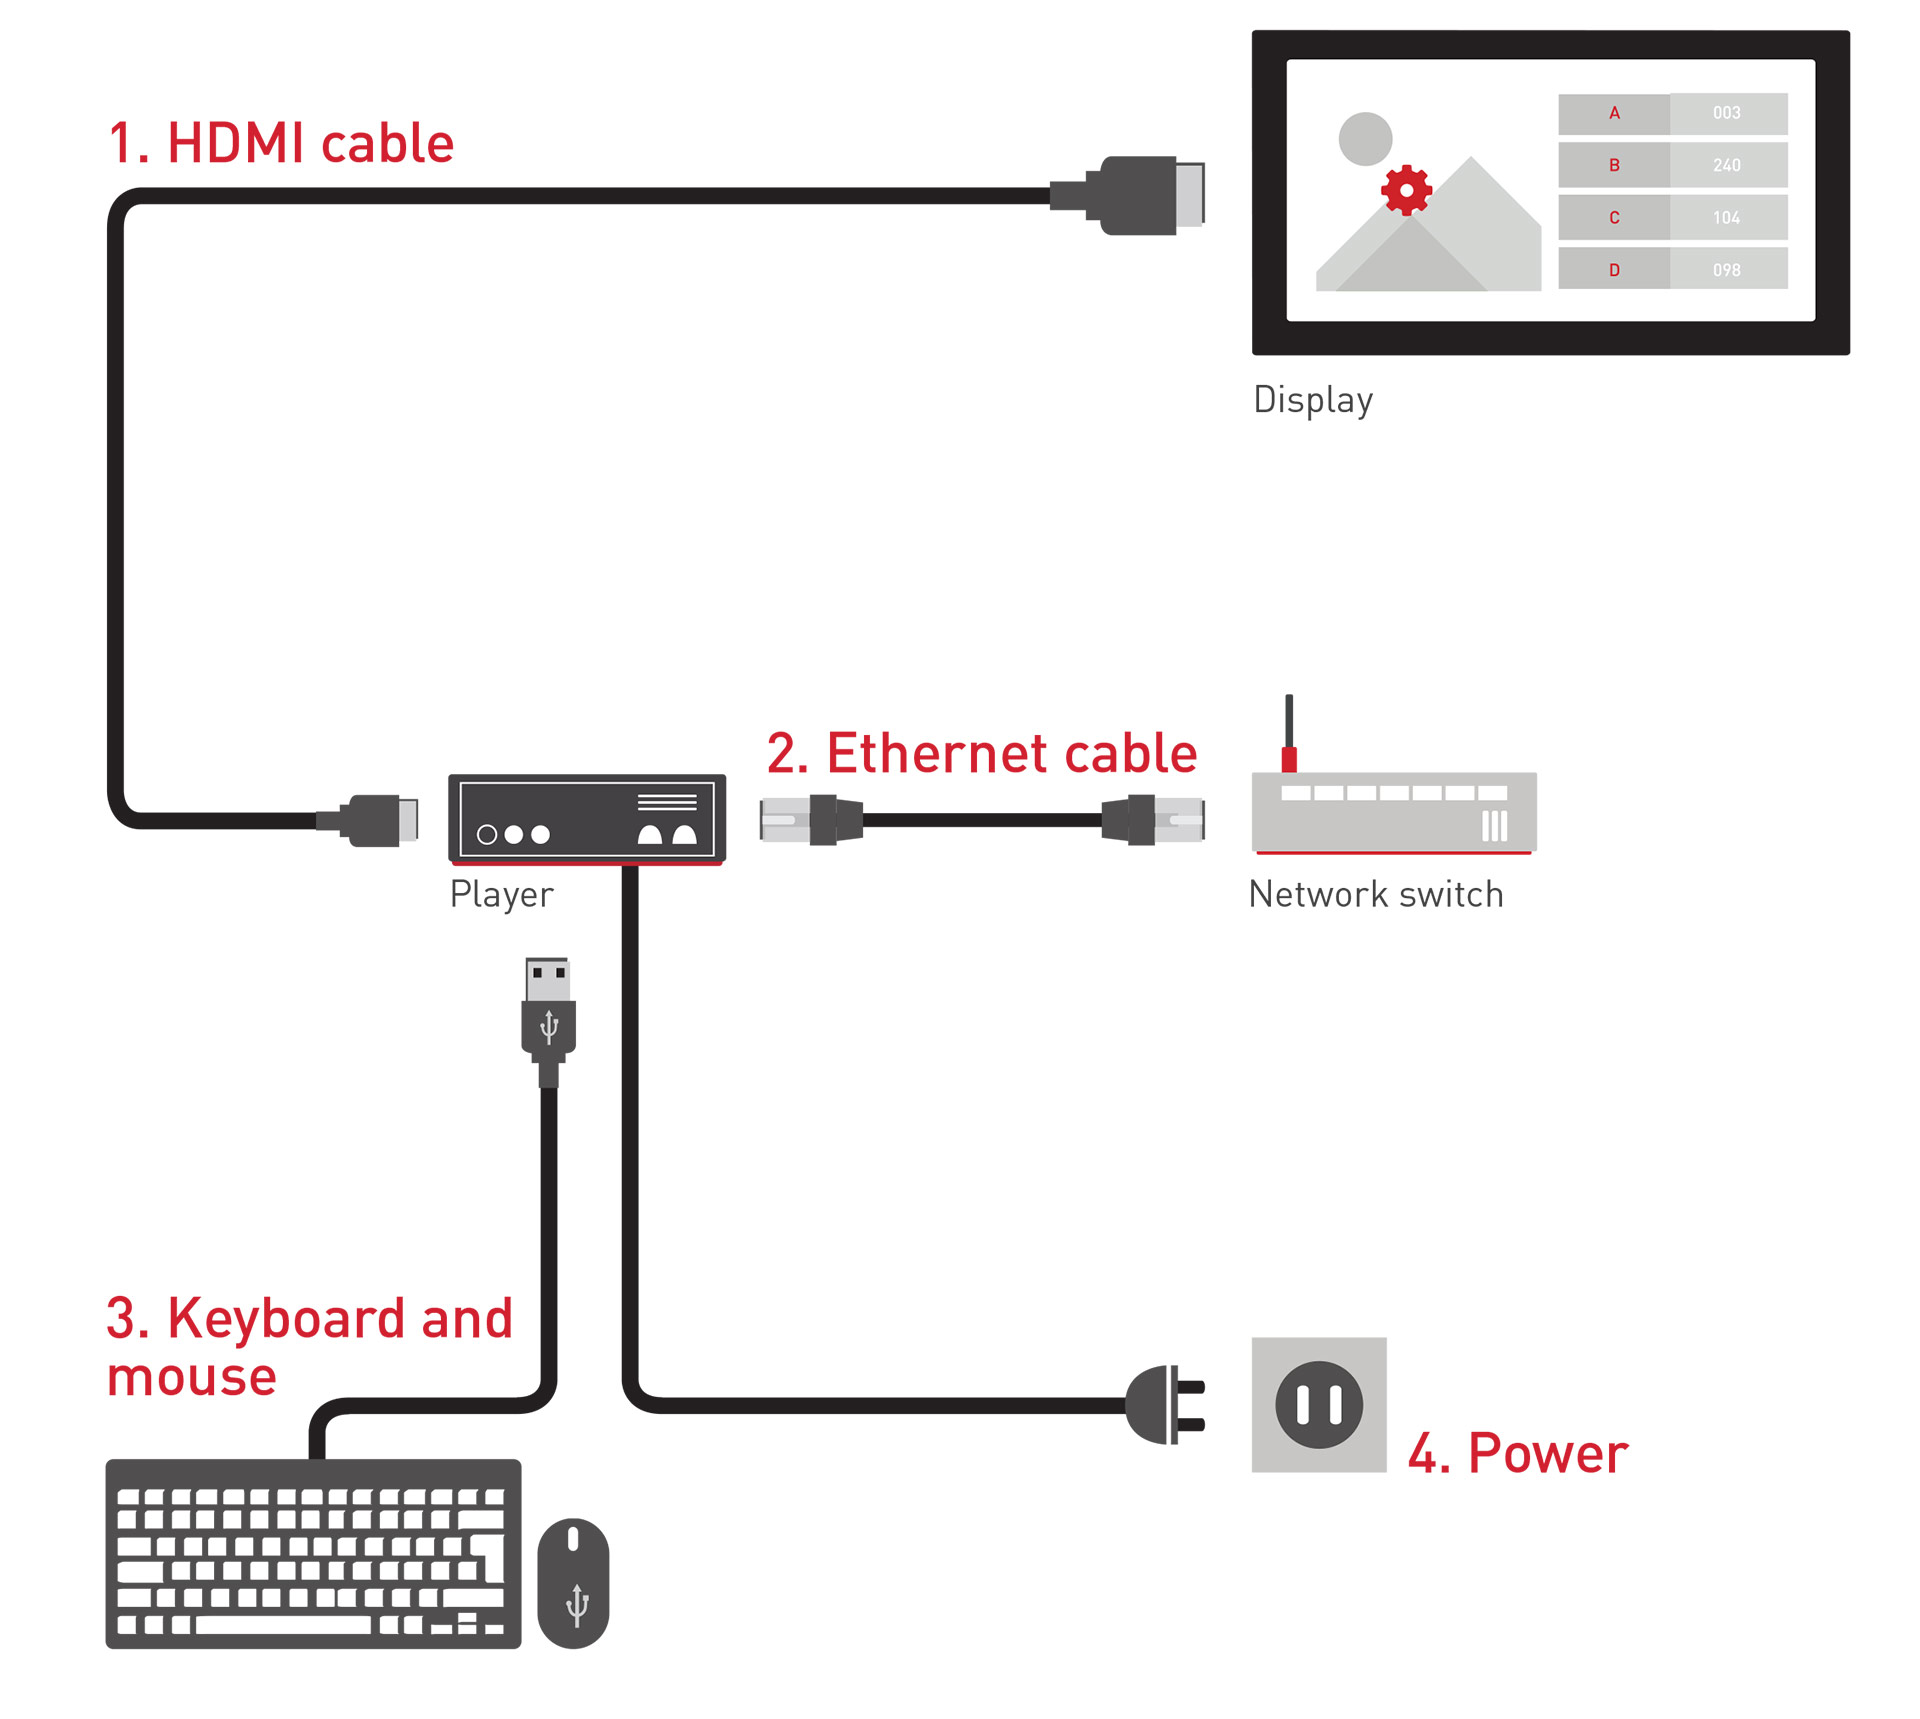
During installation:
- Connect the player to the display using the HDMI cable.
- Connect the player to the network switch using the Ethernet cable.
- Connect the keyboard and mouse to an USB port of the player.
- Power on the player by connecting the power adapter to an outlet (the player will start automatically, if not press the on/off button of the player).
First Setup
System configuration
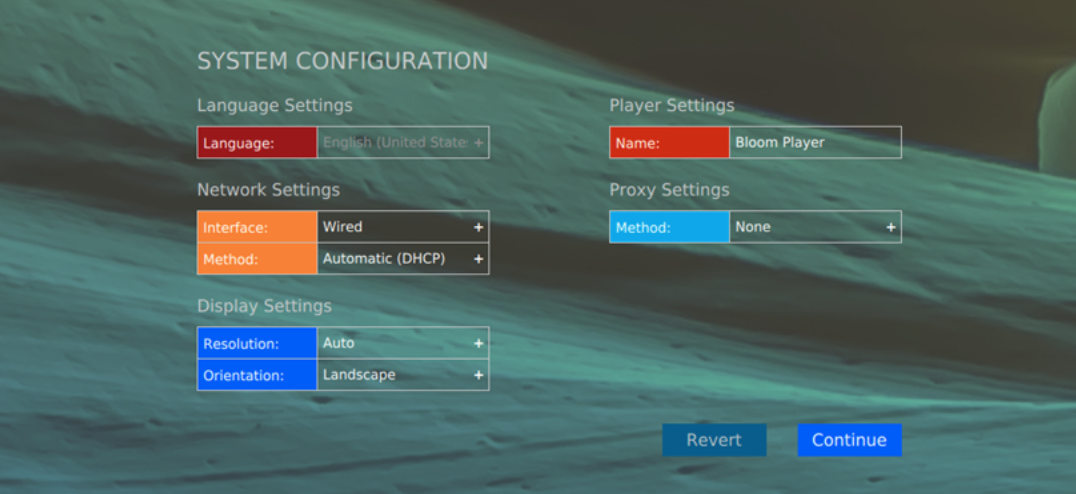
- When the player starts for the first time, the ‘System Configuration’ page will appear on the display, where you need to set the player’s:
- IP address;
- resolution and orientation;
- name (optional);
- proxy settings.
- Click on the ‘Continue’ button, and the ‘Registration’ page will appear on the display.
Player registration

- Set
- the Bloom Enterprise server’s URL;
- the Bloom Enterprise server’s port;
- the key of the location where the player is being installed (get this key in the location’s page in the system’s backoffice);
- a name to identify the player.
- Click on the ‘Register’ button.
- The player will restart with the chosen default settings.
READY TO BE CONFIGURED 🖐️ 🏁 ✅
When the player starts, its IP address is displayed in the bottom of the display. By entering that IP address in a web browser of a PC connected to the same network, it is possible to access the player’s backoffice to perform the following actions:
- Change the player’s registration settings in the ‘Register’ page if you want to register it in another server, or location, or even simply change the player’s name;
- Set the daily reboot, and the sound output in the ‘Settings’ page.
Configuration
To customize the player:
- Access the Bloom Enterprise’s backoffice.
- Go to ‘Queue Management’ > ‘Masters’ page, and enter the location where the player was added by clicking on the 🖊️ button.
- Go to ‘Management’ > ‘Devices’ subpage, and click on its 🖊️ button to access the respective configuration page.
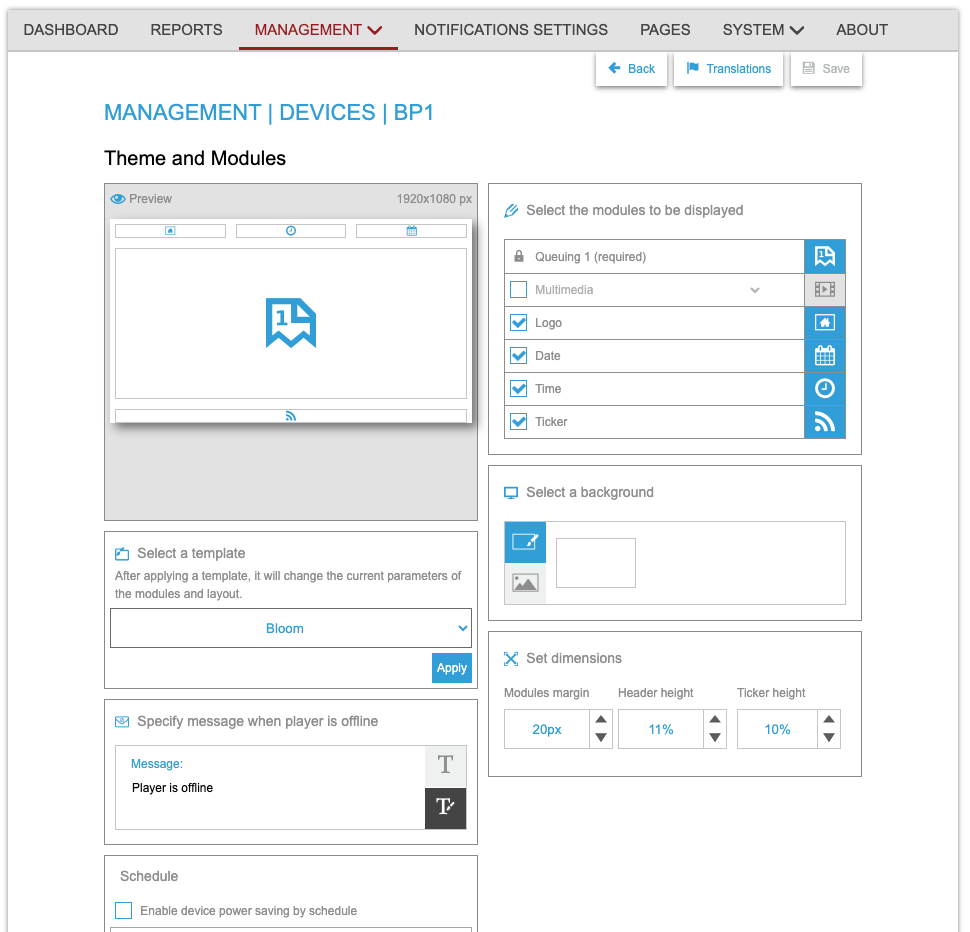
UI Example
